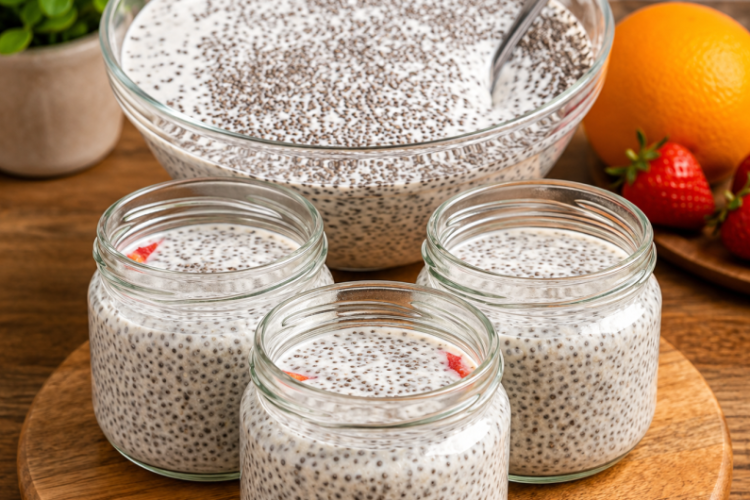
Healthy Chia Pudding is a simple no-cook recipe made with chia seeds, milk, sweetener, and pure vanilla extract. With only four ingredients and a few minutes of active preparation, the mixture transforms into a thick, creamy pudding after chilling. It is convenient for breakfast, snacks, meal preparation, or a light dessert because it can be prepared several hours ahead and kept refrigerated until you are ready to enjoy it.
The preparation is especially easy because there is no oven, stovetop, or complicated cooking technique involved. Chia seeds naturally absorb the milk while the mixture rests, gradually creating the characteristic spoonable consistency. Preparing the pudding in the evening is particularly convenient because it can thicken overnight in the refrigerator and be ready to serve the following morning with your preferred toppings.
Why Chia Pudding Is So Easy to Make
Traditional puddings often depend on cooking and thickening ingredients to develop their texture. Chia pudding takes a much simpler approach. When chia seeds are mixed with liquid, they gradually absorb moisture and form a soft gel-like coating around themselves. As more liquid is absorbed, the entire mixture naturally becomes thicker without requiring flour, cornstarch, eggs, or heat.
This natural thickening process means most of the preparation time is completely hands-off. Once the ingredients are properly mixed and the pudding has been stirred a second time to prevent clumping, it simply needs to remain refrigerated. The seeds continue hydrating while chilled, eventually producing the creamy texture that makes chia pudding so distinctive.
Choosing the Ingredients
The basic recipe requires only three tablespoons of chia seeds, one cup of milk of choice, one to two teaspoons of sweetener, and half a teaspoon of pure vanilla extract. Because the ingredient list is so short, each component contributes directly to the finished flavor and texture.
Chia seeds provide the structure, milk supplies the liquid necessary for hydration, sweetener balances the mild flavor, and vanilla adds a warm aromatic finish. Keeping the recipe simple also provides plenty of flexibility at serving time because fruit, nuts, granola, seeds, nut butter, and other toppings can be added without changing the basic preparation.
Choosing Chia Seeds
Both black and white chia seeds can be used successfully in this pudding. Their appearance is slightly different, but both varieties absorb liquid and develop the soft gel-like coating required to create the pudding consistency. There is no need to grind or soak the seeds separately before beginning.
Measure the chia seeds accurately because the quantity directly affects the final consistency. Too many seeds can create an overly dense pudding, while too few may leave excessive liquid after refrigeration. Three tablespoons for one cup of milk provides the balanced ratio used in this recipe.
Choosing the Milk
The recipe allows you to use one cup of your preferred milk. Dairy milk provides a familiar creamy flavor, while several plant-based alternatives can also be used. Almond milk creates a lighter result, oat milk offers a smooth and mildly sweet character, soy milk produces a creamy base, coconut milk adds richness, and cashew milk provides a delicate flavor.
Because milk forms most of the liquid portion of the pudding, your selection can noticeably influence both flavor and consistency. Some varieties are naturally thicker than others, so small differences in the finished texture are normal. Use a milk you already enjoy drinking for the most satisfying result.
Understanding the Chia-to-Milk Ratio
The standard ratio for this recipe is three tablespoons of chia seeds to one cup of milk. This proportion produces a pudding that becomes thick enough to eat comfortably with a spoon while remaining creamy rather than excessively dense.
Several factors can influence the final consistency, including the exact milk used, measuring accuracy, and refrigeration time. If the pudding becomes thicker than you prefer, a small amount of additional milk can be stirred into it before serving. If it remains somewhat thin, giving it additional refrigeration time may allow the seeds to absorb more liquid.
Adding the Sweetener
The recipe uses one to two teaspoons of sweetener, allowing the level of sweetness to be adjusted according to personal preference. One teaspoon creates a lightly sweet pudding, while two teaspoons give it a more noticeable sweetness.
The original recipe does not specify a particular type of sweetener, so the ingredient remains flexible. Start with the amount you normally prefer and taste the pudding after it has chilled. Because cold foods can sometimes taste slightly different from freshly mixed ingredients, final adjustments are easiest to make immediately before serving.
Why Vanilla Makes a Difference
Pure vanilla extract may be used in a relatively small quantity, but it plays an important role in the overall flavor. Half a teaspoon provides a pleasant aroma and warmth that complements the mild chia seeds and creamy milk.
Adding vanilla during the initial mixing stage ensures that its flavor is distributed evenly throughout the pudding. There is no need to add a large amount because vanilla extract is concentrated. The specified quantity is enough to give the pudding noticeable flavor without overwhelming the other ingredients.
Preparing the Chia Pudding Mixture
Start by pouring the milk into a clean bowl, jar, or food-safe container. Adding the liquid first makes it easier to distribute the chia seeds evenly. Gradually sprinkle in the chia seeds while stirring continuously rather than adding them in one large pile.
Next, add the sweetener and pure vanilla extract. Stir everything thoroughly for approximately one minute. Pay attention to the sides and bottom of the container so no dry seeds remain stuck together. Proper mixing at this stage is one of the most important steps for creating a consistent pudding texture.
Why the First Rest Is Important
After mixing, allow the pudding to sit undisturbed for approximately five to ten minutes. During this short resting period, the chia seeds begin absorbing the surrounding milk and developing their characteristic gel-like coating.
The mixture will still appear relatively thin at this point, which is completely normal. The purpose of this first rest is not to fully thicken the pudding but to begin the hydration process before the second stirring. Avoid adding additional chia seeds simply because the mixture has not yet developed a pudding consistency.
Why You Should Stir Twice
The second stir is one of the easiest steps to overlook, but it can noticeably improve the finished pudding. As chia seeds begin absorbing liquid, some can gather together and form small clusters. If these clusters remain untouched, certain areas of the pudding may become very thick while other areas stay relatively thin.
After the five-to-ten-minute rest, stir the mixture thoroughly again. Break apart any clumps and scrape around the bottom and sides of the container. Redistributing the seeds at this stage helps produce a more consistent texture once the pudding has finished chilling.
Refrigerating the Chia Pudding
Once the mixture has been stirred for the second time, cover the container securely and place it in the refrigerator. The chia seeds continue absorbing milk during refrigeration, gradually turning the thin mixture into a thick and creamy pudding.
The minimum chilling time is approximately two hours. However, allowing six to eight hours generally creates a more developed texture. Overnight refrigeration is particularly convenient when preparing the pudding for breakfast because the mixture can thicken while you sleep and be ready to serve the next morning.
Making Overnight Chia Pudding
Overnight chia pudding requires no different ingredients or special preparation. Simply prepare the mixture in the evening, complete both stirring stages, cover the container, and leave it refrigerated overnight.
By morning, the chia seeds will have had plenty of time to absorb the milk and develop a thick, spoonable consistency. Preparing individual portions in small jars can make breakfast even more convenient. Each jar can then be finished with different toppings immediately before serving.
Checking the Finished Texture
Remove the chilled pudding from the refrigerator and give it a gentle stir. Properly prepared chia pudding should be thick enough to stay on a spoon while still retaining a creamy consistency.
If it feels too thick, add a small splash of milk and stir thoroughly. Continue adding only small amounts until the desired consistency is reached. If the pudding remains thinner than expected, cover it again and refrigerate it for additional time. The seeds may continue absorbing liquid as they rest.
Making a Smoother Chia Pudding
Whole chia seeds create the characteristic texture of traditional chia pudding, but not everyone enjoys the noticeable seed texture. A smoother version can be prepared without changing the basic ingredients.
Once the pudding has fully chilled and thickened, blend it until smooth. Blending breaks down the hydrated seeds and creates a more uniform, custard-like consistency. The flavor remains essentially the same, but the texture becomes noticeably smoother and may appeal to people who prefer traditional creamy puddings.
Adding Fresh Fruit
Fresh fruit is one of the easiest ways to serve chia pudding. Strawberries, blueberries, blackberries, banana, mango, and kiwi all complement the mild vanilla base. Fruit can be scattered over the top or layered with the pudding in a serving glass.
Add fresh fruit shortly before serving whenever possible. This keeps its texture and appearance fresh while allowing the pudding to remain suitable for advance preparation. Using several different fruits can also create an attractive breakfast or dessert without requiring any additional cooking.
Adding Crunchy Toppings
The creamy texture of chia pudding pairs particularly well with crunchy toppings. Granola, almonds, walnuts, pecans, and pumpkin seeds can all provide contrast and make each spoonful more interesting.
These ingredients are best added immediately before serving rather than mixed into the pudding during refrigeration. If crunchy toppings remain in contact with the moist pudding for several hours, they can gradually soften and lose the texture that makes them appealing.
Other Topping Ideas
Nut butter, toasted coconut, dark chocolate shavings, or honey can also be used to finish the pudding. These toppings allow the same basic recipe to be served in several different ways without changing how the pudding itself is prepared.
A small spoonful of nut butter adds richness, while toasted coconut provides texture and aroma. Dark chocolate creates a more dessert-like presentation, and honey can add extra sweetness when desired. Keep toppings separate until serving when preparing several portions in advance.
Making a Chia Pudding Parfait
A chia pudding parfait is an attractive way to serve the recipe for breakfast, brunch, or dessert. Begin with a layer of chilled chia pudding in a clear glass or jar, then add fresh fruit, fruit puree, yogurt, or another preferred ingredient.
Repeat the layers until the serving glass is filled. Finish with fresh fruit or another garnish. If using granola or nuts, add them immediately before serving so they remain crunchy rather than absorbing moisture from the pudding.
Preparing Chia Pudding Ahead of Time
Chia pudding is particularly suitable for meal preparation because most of the work can be completed well before serving. Prepare individual portions in small jars or covered containers, refrigerate them, and add toppings when you are ready to eat.
Preparing several servings in advance also allows you to change the toppings from day to day. One portion can be served with berries, another with banana and nuts, and another with granola. The pudding base remains the same while the finished servings feel different.
How to Store Chia Pudding
Keep prepared chia pudding covered and refrigerated. It is generally at its best during the first couple of days, although the supplied recipe notes that properly refrigerated pudding can generally be stored for approximately four to five days when prepared with fresh ingredients.
Keep toppings separate during storage whenever possible. Fresh fruit can release moisture, while granola and nuts can soften after prolonged contact with the pudding. Adding them immediately before serving gives the finished dish a fresher flavor and better texture.
Common Mistakes to Avoid
One of the most common problems is inadequate stirring. Chia seeds can quickly form clusters after being mixed with liquid, so both the initial thorough mixing and second stir after five to ten minutes are important. Skipping the second stir can result in an uneven pudding with thick clumps and thin areas.
Another common mistake is expecting the pudding to thicken immediately. The mixture requires refrigeration to develop properly. Give the seeds enough time to hydrate before deciding that the pudding is too thin or adding additional ingredients.
Notes for the Best Results
Stir the mixture thoroughly when the ingredients are first combined and stir again after five to ten minutes. This simple method helps distribute the seeds and reduces clumping. Do not worry if the mixture appears thin immediately after preparation because the chia seeds require time to absorb the liquid.
Allow at least two hours for chilling, although six to eight hours or overnight will generally provide a more developed texture. If the finished pudding is too thick, stir in a little milk. If it remains too thin, refrigerate it longer. Add crunchy toppings immediately before serving so they retain their texture.
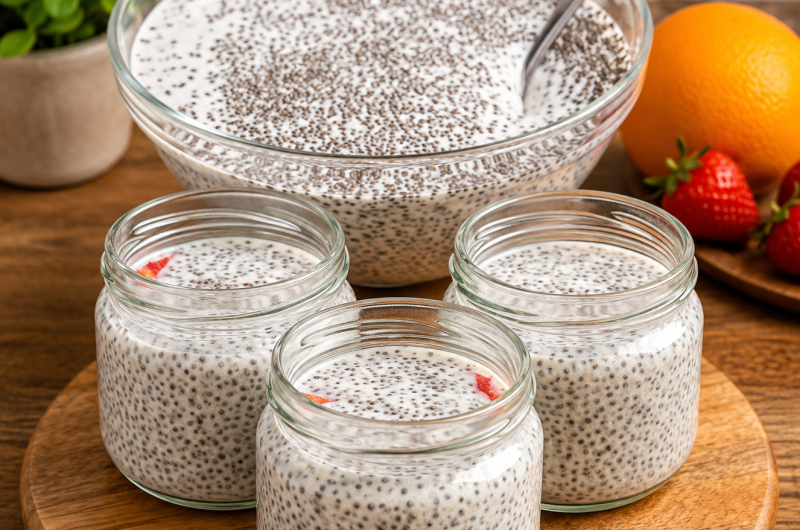
Healthy Chia Pudding
A simple, creamy chia pudding made with chia seeds, milk, sweetener, and vanilla. An easy no-cook recipe for breakfast, snacks, or dessert.
1
servings10
minutes10
minutes280
kcal2
hours2
hours20
minutesIngredients
3 tbsp chia seeds
1 cup milk of choice
1–2 tsp sweetener
½ tsp pure vanilla extract
Directions
- Mix milk, chia seeds, sweetener, and vanilla.
- Rest for 5–10 minutes.
- Stir again to break up clumps.
- Cover and chill for at least 2 hours.
- Stir and add a little milk if too thick.
- Add desired toppings and serve cold.
Nutrition Facts
1 servings per container
- Amount Per ServingCalories280
- % Daily Value *
- Total Fat
12g
16%
- Total Carbohydrate
30g
11%
- Protein 11g 22%
* The % Daily Value tells you how much a nutrient in a serving of food contributes to a daily diet. 2,000 calories a day is used for general nutrition advice.
