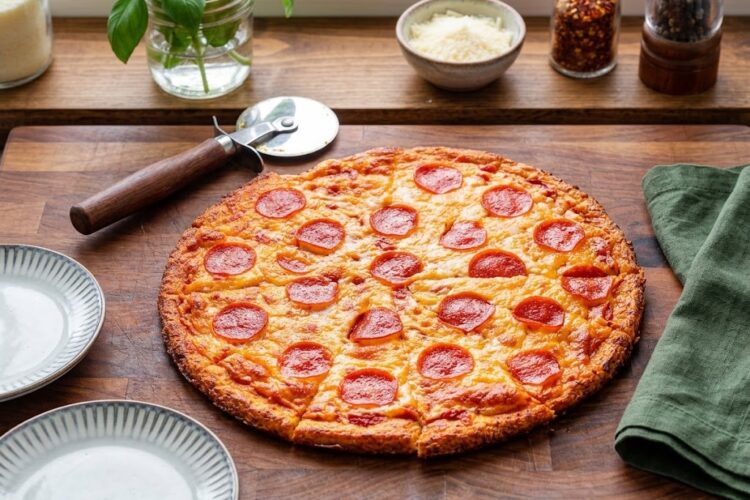
Making pizza at home doesn’t have to mean dealing with heavy, carb-loaded dough. This cauliflower pizza crust recipe changes everything by using just three basic ingredients to create something crispy, sturdy, and surprisingly delicious. Whether you’re following a low-carb lifestyle or simply looking for a gluten-free pizza option, this recipe delivers results that even people who don’t diet will enjoy eating straight from their hands.
Why This Cauliflower Crust Works Better Than Most
Most cauliflower pizza crusts fall apart the moment you pick them up or taste like nothing but vegetables. This recipe solves both problems. The combination of cauliflower, eggs, and parmesan cheese creates a structure that holds together while staying light and crispy. You won’t find yourself looking for a fork or tasting a strong vegetable flavor that overpowers your toppings.
Benefits of Making Your Own Crust
Store-bought cauliflower crusts often contain long ingredient lists with binders, starches, and additives that defeat the purpose of eating healthier. This homemade version strips everything back to basics. You control exactly what goes into your pizza, which means no mystery ingredients or unnecessary fillers. The result is a crust that contains just three grams of net carbs per serving, making it genuinely low-carb rather than just marketing speak.
Ingredient and Its Purpose
The cauliflower serves as your crust base, providing bulk and substance without heavy carbs. One large head of cauliflower gets transformed into rice-sized pieces that cook down to something surprisingly pizza-like. You can buy pre-riced frozen cauliflower if you want to skip the food processor step, which saves time without sacrificing results.
Eggs
Eggs act as the primary binder in this recipe, holding the cauliflower together without needing flour or other starches. Three large eggs are enough to create a sturdy mixture that becomes firm when baked. This is non-negotiable for the recipe—egg substitutes won’t work because they lack the protein structure needed to keep the crust from falling apart.
Why Parmesan Cheese Makes the Difference
Parmesan cheese does double duty in this crust. It adds flavor while also providing extra binding power that keeps everything together. Some recipes use mozzarella instead, but parmesan creates a noticeably sturdier result. The cheese prevents your crust from becoming soggy or fragile, letting you pick up slices without them bending or breaking.
Preparing Your Cauliflower Correctly
Start by breaking down a large head of cauliflower into florets. Using a food processor with a grater attachment gives you rice-shaped pieces, but the exact shape matters less than the size. Pulse the florets until you get pieces roughly the size of rice grains. If you don’t have a food processor, you can chop by hand—it just takes longer.
Cooking Step That Changes Everything
Once your cauliflower is riced, place it in an oiled skillet on the stove. This stir-frying step is absolutely crucial and shouldn’t be rushed. Cook for about ten minutes, stirring occasionally, until the cauliflower becomes very soft and the moisture evaporates. This isn’t about keeping it crisp-tender like you’d serve cauliflower as a side dish—you want it mushy and dry. This is what prevents your finished crust from becoming soggy.
Deciding Whether to Squeeze Your Cauliflower
Many recipes require squeezing the cooked cauliflower in a kitchen towel to remove extra moisture. This step does make a difference for one large pizza, which this recipe creates. However, if you want to make two smaller pizzas instead, you can skip this step and save yourself the effort. The choice depends on how large you want your finished pizza to be.
Mixing Your Pizza Dough Base
In a large bowl, whisk three eggs together until well combined. Stir in one and a half cups of grated parmesan cheese, mixing thoroughly. If you’re using optional seasonings like Italian seasoning or garlic powder, add them now. Then fold in your cooled cauliflower rice, mixing everything until the cauliflower is evenly coated with the egg and cheese mixture. This step matters more than it sounds—the eggs need to be distributed throughout so every part of your crust bakes evenly.
Shaping Your Crust on the Baking Surface
Spread the cauliflower mixture onto parchment paper with your hands, pressing it down to about one-quarter inch thick. Don’t be afraid to use pressure here—you’re creating a pizza crust, not a delicate cake. The thickness should be consistent across the entire surface so it bakes evenly. Work quickly because the mixture becomes harder to spread as it cools.
Getting the Best Results with a Pizza Stone
Using a pizza stone makes a noticeable difference in how crispy your finished crust becomes. Place the stone in your oven before preheating so it has time to reach the proper temperature. When your crust is shaped, use a pizza peel to slide the parchment paper directly onto the hot stone. This creates an extra-crispy bottom that you can’t achieve with a regular pizza pan.
The First Baking Stage
Bake at 400 degrees Fahrenheit for about fifteen minutes. You’re looking for a crust that’s dry and firm on top with slightly golden edges. The cauliflower will firm up considerably during this stage. Don’t skip this step by trying to add toppings immediately—the crust needs this initial baking time to create a seal that prevents sogginess later.
Cooling Your Crust for Best Results
Let your baked crust cool at room temperature for at least five to ten minutes before adding toppings. This resting period allows the structure to become even more stable and firm. Without this pause, your hot crust can become mushy when you add sauce and wet ingredients. Patience at this stage directly affects how good your finished pizza tastes.
Adding Your Favorite Toppings and Final Bake
Once cooled, add whatever pizza toppings you enjoy. Keep them relatively light to avoid overloading the crust. Return the pizza to the oven for another five to ten minutes, just long enough for the cheese to melt and toppings to warm through. Your oven temperature stays at 400 degrees—no adjustment needed.
Flavor Options and Seasonings
The plain version of this crust has a mild cauliflower flavor that doesn’t overpower your toppings. If you want more seasoning, add Italian seasoning or dried oregano along with garlic powder when you mix the egg and cheese. These additions give you more pizza flavor without changing the basic recipe or requiring extra ingredients.
Making Multiple Pizzas at Once
This recipe makes one large thirteen-inch pizza or two smaller pizzas. Making two smaller pizzas is actually easier than squeezing the cauliflower rice, so it’s a good option if you’re feeding a crowd or want leftovers. Divide your cauliflower mixture between two baking surfaces and bake both at the same time, adjusting the timing slightly as needed.
Storage and Reheating Your Leftover Pizza
Leftover slices keep in the refrigerator for three to five days, though they do become softer over time. The best way to reheat is using an air fryer, which restores crispness. Microwaving works but results in a softer crust that you’ll need to eat with a fork. Plan your storage based on when you’ll eat the leftovers.
Meal Prep and Make-Ahead Options
You can prepare the cauliflower pizza crust in advance and freeze it before adding toppings. Bake from frozen, adding a few extra minutes to the cooking time. You can also freeze the unbaked cauliflower mixture for several weeks. This makes it easy to have homemade cauliflower pizza whenever the craving strikes without doing all the work in one day.
Choosing Your Toppings Wisely
Since your crust is already sturdy and delicious on its own, you don’t need heavy toppings. Classic combinations work best—sauce, cheese, and your choice of vegetables or proteins. Consider that every wet topping adds moisture, so avoid going overboard with sauce. A lighter hand with toppings means a crispier, better-textured finished pizza.
Why This Crust Outperforms Store-Bought Versions
Store-bought cauliflower crusts often contain potato starch, tapioca starch, allulose, or other binders to create texture. This recipe achieves the same texture without any of those ingredients. The result tastes more like actual food and costs significantly less. You’re also getting maximum vegetable nutrition since the crust is basically just cauliflower, eggs, and cheese.
Common Mistakes to Avoid
Don’t skip the stir-frying step or cook the cauliflower until it’s only tender—it needs to be quite soft and the moisture needs to evaporate. Don’t rush the cooling period after the initial bake, as this creates the seal that prevents sogginess. Mix the egg and cheese thoroughly with the cauliflower rather than just combining them briefly. These three points make the difference between a great crust and one that falls apart.
Equipment That Makes This Recipe Easier
A food processor speeds up the cauliflower ricing significantly. A pizza stone and peel create the best crust texture. A kitchen towel makes squeezing easier if you go that route. None of these are absolutely required, but they do make the process faster and results better.
Keto Cauliflower Pizza Crust
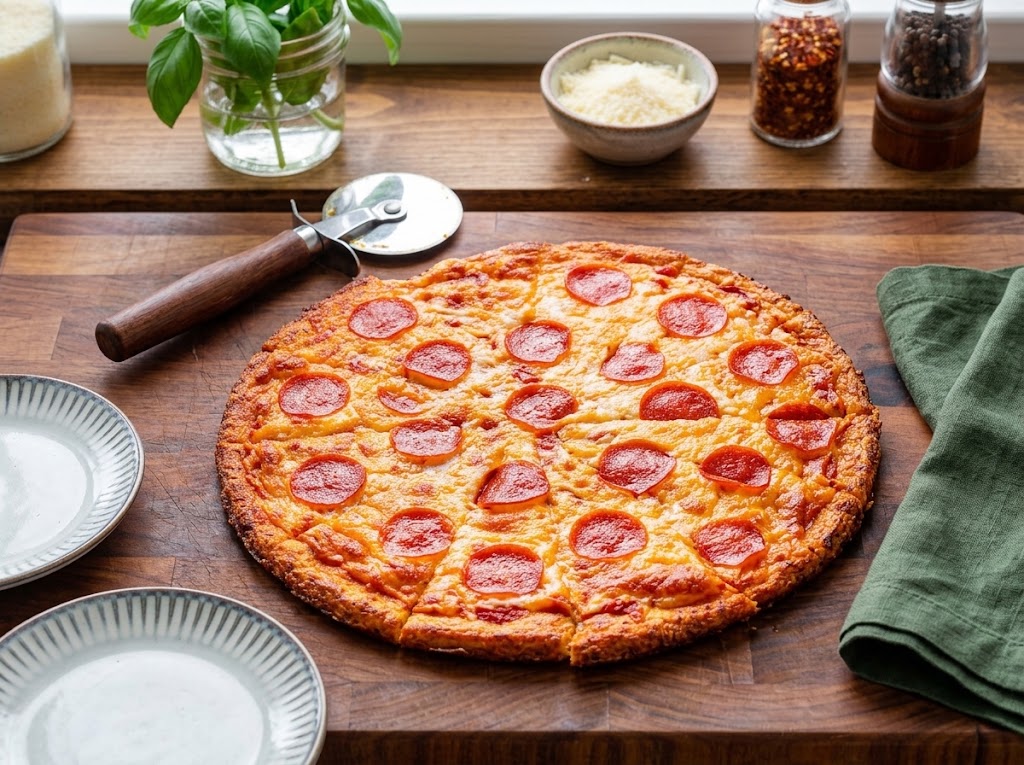
A simple, sturdy cauliflower pizza crust made with just three basic ingredients. Crispy on the edges, firm enough to pick up with your hands, and packed with vegetables. This low-carb, gluten-free crust holds up to any toppings you choose.
8
slices15
minutes30
minutes128
kcal3.4
g45
minutesIngredients
1½ pounds cauliflower florets (approximately 1 large head)
1½ cups parmesan cheese, grated
3 large eggs
½ tablespoon Italian seasoning (optional)
½ teaspoon garlic powder (optional)
Oil for cooking
Directions
- Prepare your oven and surfaces – Preheat your oven to 400 degrees Fahrenheit. Line a pizza peel with parchment paper if using a pizza stone, or prepare a pizza pan. Place your pizza stone in the oven now so it reaches full temperature.
- Process the cauliflower – Place cauliflower florets into a food processor and pulse until the pieces resemble rice grains. If you have a grater attachment, use that for best results. You should have roughly six cups of riced cauliflower.
- Cook the cauliflower rice – Heat oil in a skillet over medium-high heat. Add your riced cauliflower and stir-fry for about ten minutes until very soft and most moisture has evaporated. The texture should be mushy, not crisp-tender.
- Prepare your egg and cheese mixture – In a large bowl, whisk the three eggs together until well combined. Stir in the grated parmesan cheese. Add Italian seasoning and garlic powder if using. Mix these ingredients thoroughly.
- Combine all ingredients – Allow your cooked cauliflower to cool slightly, then fold it into the egg and cheese mixture. Mix everything very thoroughly so the cauliflower is evenly coated. You can press with a spatula to help combine everything.
- Shape and bake your crust – Spread the mixture onto your prepared parchment paper with your hands, pressing down to create a thickness of about one-quarter inch. If using a pizza stone, transfer the parchment paper onto the hot stone using your pizza peel. Bake for fifteen minutes until the top is dry and firm with slightly golden edges.
Nutrition Facts
- Calories: 128kcal
- Fat: 7.4g
- Carbohydrates: 5.1g
- Fiber: 1.7g
- Sugar: 1.9g
- Protein: 11.2g
