
If you miss the familiar taste of a classic chocolate peanut butter cup while following a low-carb lifestyle, this Sugar-Free Keto Peanut Butter Cups recipe offers a delicious homemade alternative. The combination of rich chocolate and creamy peanut butter is difficult to resist, and this version allows you to enjoy those flavors without relying on traditional added sugar. It is designed for people following a ketogenic diet, reducing their carbohydrate intake, or simply looking for a lower-sugar dessert option that still feels satisfying and indulgent.
These homemade keto peanut butter cups are simple to prepare and require only a small collection of ingredients. There is no complicated baking process, special equipment, or difficult candy-making technique involved. The recipe is created by forming a chocolate base, adding a smooth peanut butter filling, and covering everything with another layer of melted chocolate. After chilling, the layers become firm and create a dessert with a rich chocolate shell surrounding a creamy and slightly salty center.
The finished cups are ideal for keeping in the refrigerator when you want a quick low-carb dessert. Because they are individually portioned, they are also convenient to serve and store. The rich ingredients make each cup feel satisfying, so a small serving can provide the familiar chocolate and peanut butter experience without the large amount of sugar commonly found in traditional candy.
Why These Keto Peanut Butter Cups Are So Popular
Traditional peanut butter cups are usually high in sugar and carbohydrates, which can make them difficult to include in a ketogenic or low-carb eating plan. For many people, giving up favorite desserts can be one of the most challenging parts of changing their diet. Homemade sugar-free desserts provide another option by using ingredients that better suit individual dietary goals.
These keto peanut butter cups are popular because they recreate a familiar flavor combination without requiring a complicated recipe. The chocolate provides a rich cocoa taste, while the peanut butter filling brings creaminess and a naturally nutty flavor. Powdered erythritol adds sweetness to the filling, allowing the recipe to maintain a dessert-like taste without using regular sugar.
Another reason for their popularity is convenience. The preparation involves melting, mixing, layering, and chilling. The freezer helps each layer become firm, which means there is no need for an oven. Once the cups are prepared, they can be stored in the refrigerator and enjoyed whenever a chocolate craving appears.

The Perfect Balance of Chocolate and Peanut Butter
The success of a good peanut butter cup depends on the balance between its two main flavors. The chocolate should provide enough richness to complement the filling, while the peanut butter should remain noticeable and creamy. In this recipe, sugar-free dark chocolate creates a deep cocoa flavor that works especially well with the mild saltiness of peanut butter.
The peanut butter filling is smooth and rich, but it is supported by powdered erythritol and peanut flour. These ingredients help create a thicker consistency while adding sweetness and structure. A small amount of sea salt can make a noticeable difference by bringing out the natural flavor of the peanut butter and balancing the sweetness.
The chocolate shell and peanut butter center also create an enjoyable contrast in texture. After chilling, the chocolate becomes firm, while the center remains softer and creamier. When you bite into one of the cups, the outer layer gives way to the smooth filling, creating the classic texture associated with traditional peanut butter cups.
Ingredient Overview
Each ingredient in these sugar-free keto peanut butter cups serves a useful purpose. Although the recipe is simple, the combination of ingredients creates the structure, sweetness, flavor, and texture needed for a successful result.
Sugar-Free Dark Chocolate
Sugar-free dark chocolate forms the bottom and top layers of the peanut butter cups. It creates the rich chocolate flavor and provides the firm outer shell once chilled. Choosing a good-quality chocolate can improve both the flavor and texture of the finished dessert.
Coconut Oil
Coconut oil is used with both the chocolate and peanut butter mixture. It helps the ingredients melt and blend smoothly. Because coconut oil becomes firm when chilled, it also supports the structure of the finished cups and helps the layers set properly.
Creamy Peanut Butter
Creamy peanut butter forms the main part of the filling. It provides the rich, nutty flavor that defines the recipe and creates the soft center between the two chocolate layers.
Powdered Erythritol
Powdered erythritol adds sweetness without using regular sugar. The powdered form works particularly well because it blends more easily into the peanut butter mixture and helps maintain a smoother texture.
Peanut Flour
Peanut flour gives the filling additional structure. It helps create a thicker mixture that remains centered inside the chocolate shell instead of spreading too much toward the edges.

Vanilla Extract and Sea Salt
Vanilla extract is optional but can add a pleasant aroma and depth of flavor. A pinch of sea salt helps balance the sweetness and enhances the natural flavor of both the chocolate and peanut butter.
Preparing the Muffin Pan
Before melting the ingredients, prepare a standard muffin pan by lining it with parchment paper liners or candy cups. This makes the finished peanut butter cups easier to remove and helps maintain a consistent shape.
Preparing the pan before starting is also helpful because melted chocolate can begin to thicken as it cools. Having the liners ready allows you to transfer the chocolate directly into the pan without interruption. It also makes the overall preparation cleaner and more organized.
Making the Bottom Chocolate Layer
The first step is creating the chocolate base. Melt half of the sugar-free dark chocolate with half of the coconut oil. This can be done using a double boiler or by heating the mixture in short intervals in the microwave.
If using a microwave, heat the chocolate carefully and stir between intervals. Chocolate can burn or become too thick when overheated, so slow melting is important. Once the mixture is completely smooth, add half of the vanilla extract if you are using it.
Spoon approximately two teaspoons of melted chocolate into each prepared liner. Spread it gently so the bottom is evenly covered. Place the muffin pan in the freezer for around ten minutes, allowing the chocolate layer to become firm.
Preparing the Creamy Peanut Butter Filling
While the chocolate bases are chilling, prepare the peanut butter filling. Combine the creamy peanut butter and coconut oil in a separate bowl and melt gently until smooth.
Once the mixture is combined, add the powdered erythritol, peanut flour, optional vanilla extract, and sea salt. Stir thoroughly until the ingredients are evenly incorporated. The mixture should be creamy but thick enough to remain in the center of the chocolate base.
Adjusting the Filling
Before assembling the cups, you can check the sweetness and flavor of the peanut butter mixture. Depending on the products used, some people may prefer a slightly sweeter filling or a little more salt. Small adjustments can be made according to personal preference while keeping the overall recipe balanced.
Adding the Peanut Butter Layer
After the bottom chocolate layer has firmed, remove the muffin pan from the freezer. Spoon approximately one teaspoon of the peanut butter mixture into the center of each cup.
Try to keep the filling away from the outer edges. The final chocolate layer needs space to flow around and completely cover the peanut butter center. Allow the filling to spread naturally, but avoid pushing it all the way to the sides.
Once all the cups have been filled, return the pan to the freezer for another ten minutes. This helps the peanut butter mixture become firm enough to support the top chocolate layer.

Creating the Top Chocolate Layer
Melt the remaining sugar-free dark chocolate with the remaining coconut oil using the same gentle method used for the bottom layer. Stir frequently until the mixture is smooth and glossy. Add the remaining vanilla extract if desired.
Spoon approximately two teaspoons of melted chocolate over the top of each chilled peanut butter center. Make sure the filling is completely covered. You can use the back of a spoon to gently guide the chocolate toward the edges if necessary.
A complete chocolate covering helps create the recognizable peanut butter cup appearance. It also keeps the filling enclosed and gives each cup a neat structure after chilling.
Final Freezing and Setting
Once the final chocolate layer has been added, place the muffin pan back into the freezer. Allow the cups to chill for approximately twenty to thirty minutes, or until they are completely firm.
After they have set, remove the cups from the muffin pan and carefully peel away the liners. The finished dessert should have a firm chocolate exterior with a creamy peanut butter center.
The cups can be enjoyed immediately after setting, although they are generally best stored in the refrigerator. Keeping them chilled helps maintain their shape and texture.
Tips for Perfect Keto Peanut Butter Cups
A few simple preparation habits can help produce the best possible results. One of the most important is melting the chocolate slowly. High heat can affect the texture and make it difficult to work with. Short heating intervals and regular stirring provide better control.
Another important step is allowing each layer to firm before adding the next. The chocolate base should be solid enough to support the peanut butter filling, and the filling should be chilled before the final chocolate coating is added. This creates cleaner layers and prevents the ingredients from blending together.
Using creamy peanut butter can also improve the consistency of the filling. A smooth peanut butter combines more easily with the coconut oil, sweetener, and peanut flour. If the mixture becomes too soft while assembling the cups, allowing it to cool slightly can make it easier to portion.
Storage and Shelf Life
These sugar-free peanut butter cups should be stored in an airtight container in the refrigerator. The cool temperature helps keep the chocolate firm and prevents the coconut oil from becoming too soft.
When properly stored, they can generally be kept in the refrigerator for up to one week. If you want to prepare them further in advance, they can also be frozen for longer storage.
Freezing for Longer Storage
Place the fully set peanut butter cups in an airtight freezer-safe container. If stacking them, separating the layers can help prevent them from sticking together.
When ready to eat, remove a cup from the freezer and allow it to sit briefly before serving. This gives the filling and chocolate time to soften slightly, making the texture more enjoyable.

Nutritional Highlights
These keto peanut butter cups are designed as a lower-carbohydrate alternative to traditional candy. Based on the stated nutritional information, each serving contains approximately 187 calories, 18 grams of fat, 14 grams of total carbohydrates, 11 grams of fiber, 3 grams of net carbohydrates, 0.1 grams of sugar, and 3 grams of protein.
The combination of chocolate, peanut butter, and coconut oil creates a rich dessert with a high fat content, which can fit comfortably into many ketogenic eating plans. The fiber content also contributes to the lower net carbohydrate calculation.
Keep in mind that nutritional values can vary depending on the specific brands of chocolate, peanut butter, coconut oil, sweetener, and other ingredients used. Checking individual product labels is useful when precise nutritional tracking is important.
Why Homemade Keto Desserts Are So Appealing
Homemade keto desserts allow you to have greater control over the ingredients you use. Instead of relying on commercially prepared candy, you can choose the type of sugar-free chocolate, peanut butter, and sweetener that best fits your preferences.
This is especially useful for people who are trying to reduce added sugar while still enjoying familiar desserts. A homemade recipe also allows you to adjust small details such as sweetness, saltiness, and chocolate intensity.
These peanut butter cups are particularly convenient because they do not require baking. The freezer does most of the work, allowing the ingredients to firm naturally after the layers are assembled.
Customization Ideas
The basic recipe can be customized in several simple ways while maintaining the chocolate and peanut butter combination. You can experiment with different varieties of sugar-free chocolate to create a stronger or milder cocoa flavor.
Adding Extra Texture
Crushed nuts can be sprinkled over the top of the cups before the final chilling period. This adds a little crunch and gives the finished dessert a different texture.
Adjusting the Sweetness
The powdered erythritol can be adjusted slightly based on personal taste. Some people prefer a less sweet, darker chocolate flavor, while others may enjoy a sweeter peanut butter center.
A Simple Low-Carb Dessert for Chocolate Lovers
These Sugar-Free Keto Peanut Butter Cups prove that following a low-carb lifestyle does not mean giving up the classic flavors you enjoy. The combination of smooth sugar-free chocolate and creamy peanut butter creates a rich dessert that feels familiar, satisfying, and easy to prepare.
The recipe is straightforward enough for beginners while still producing an attractive homemade dessert. The individual portions are convenient for serving, storing, and enjoying throughout the week.
By allowing each layer to chill properly and using smooth, high-quality ingredients, you can create peanut butter cups with a firm chocolate shell and a creamy center. The recipe can also be adjusted according to your preferred level of sweetness or texture.
Whether you are following a ketogenic diet, reducing your sugar intake, or simply searching for an easy homemade chocolate dessert, these low-carb peanut butter cups offer a delicious option. Rich chocolate, creamy peanut butter, a touch of sweetness, and a hint of salt come together in every bite, creating a dessert that can easily become a regular favorite in your collection of keto-friendly treats.
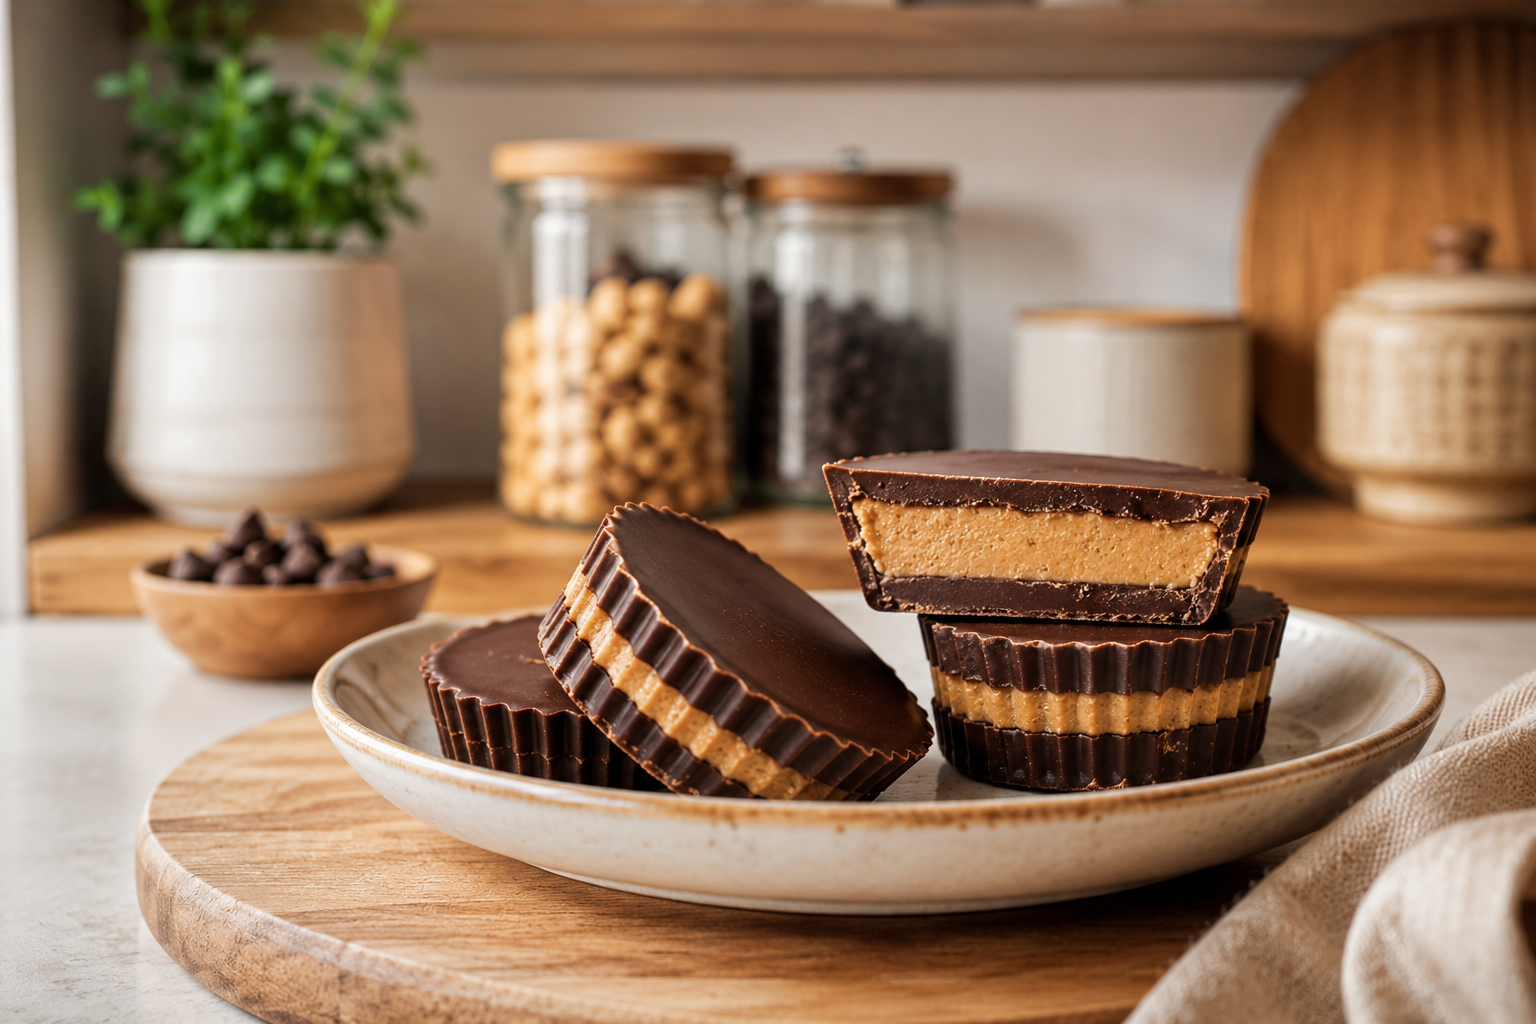
Keto Peanut Butter Cups
Homemade low-carb peanut butter cups made with sugar-free dark chocolate, coconut oil, and creamy peanut butter filling. Perfect for keto and gluten-free lifestyles.
12
servings10
minutes5
minutes145
kcal40
minutes55
minutesIngredients
- Chocolate Layers:
10 oz sugar-free dark chocolate
5 tbsp coconut oil (divided)
½ tsp vanilla extract (optional, divided)
- Peanut Butter Layer:
3½ tbsp creamy peanut butter
2 tsp coconut oil
4 tsp powdered erythritol (to taste)
1½ tsp peanut flour
⅛ tsp vanilla extract (optional)
1 pinch sea salt (optional)
Directions
- Line a muffin pan with parchment paper liners.
- Melt half the chocolate with half the coconut oil. Stir in half the vanilla if using.
- Spoon about 2 teaspoons into each liner and freeze 10 minutes.
- Melt peanut butter and coconut oil. Stir in erythritol, peanut flour, vanilla, and salt
- Spoon 1 teaspoon of filling into each cup and freeze 10 minutes.
- Melt remaining chocolate and coconut oil, stir in remaining vanilla.
- Cover each cup with chocolate and freeze 20–30 minutes until firm.
- Store in refrigerator.
Nutrition Facts
- Calories: 145kcal
- Fat: 14.4g
- Carbohydrates: 8.1g
- Fiber: 4.9g
- Sugar: 0.1g
- Protein: 3.8g
