
These gluten-free buttermilk biscuits are made to be soft in the center, lightly crisp around the edges, and sturdy enough to split without falling apart. Cold butter, eggs, buttermilk, and a gluten-free flour blend create the base for a tender homemade biscuit. They are suitable for breakfast, brunch, or as a simple side dish for lunch and dinner. The original recipe makes 12 biscuits and uses a 400°F oven.
Why Make Gluten-Free Biscuits
Finding a good gluten-free biscuit can be difficult because many versions become dry, dense, or crumbly. Wheat flour normally provides gluten, which helps dough stretch and hold together. This recipe uses a gluten-free flour blend with xanthan gum to provide structure instead. The result is a biscuit that can be shaped, cut, baked, and served much like a traditional homemade buttermilk biscuit.
What Gives These Biscuits Their Texture
The combination of cold butter, eggs, and buttermilk is important for the final texture. Butter creates richness and helps form flaky areas as it melts in the oven. Eggs add moisture and help bind the dough, while buttermilk gives the biscuits a mild tang and tender crumb. Baking powder and baking soda provide the lift needed for biscuits that rise instead of staying flat.
Choosing Gluten-Free Flour
Use a gluten-free flour blend that contains xanthan gum, as specified in the original recipe. This ingredient helps the dough hold together and makes the biscuits easier to shape. Different gluten-free flour blends can behave differently, so staying with a suitable all-purpose blend gives more predictable results. The recipe calls for 4 cups, or 560 grams, of gluten-free flour blend.
The Importance of Cold Butter
Cold butter is one of the most useful details in this gluten-free biscuit recipe. When small pieces of butter remain throughout the flour mixture, they melt during baking and help create lighter layers. If the butter becomes soft before the biscuits reach the oven, it can blend too deeply into the flour. Keep the butter chilled and work efficiently when preparing the dough.
Why Cold Eggs and Buttermilk Help
The eggs and buttermilk should also be cold when they are added. Cold wet ingredients help keep the dough temperature down, which protects the butter from melting too early. Buttermilk also works well with baking soda because of its natural acidity. Together, these ingredients create a moist dough with enough structure to produce tender, well-risen gluten-free biscuits.
Mixing the Dry Ingredients
Begin by whisking the gluten-free flour blend, baking powder, salt, and baking soda together in a large bowl. Mixing these ingredients first helps distribute the leavening agents evenly throughout the flour. This matters because unevenly distributed baking powder or baking soda can cause inconsistent rising. Once the dry ingredients are blended, the cold butter can be added.
Cutting in the Butter
Add the cold butter pieces to the flour mixture and work them in with a pastry cutter or your hands. Stop when small, pea-sized pieces of butter remain throughout the mixture. You do not need to make the flour completely smooth. Those small pieces of butter are useful because they separate portions of the dough and contribute to the flaky texture once heat reaches the biscuits.
Adding the Buttermilk and Eggs
In a separate bowl, combine the cold eggs with the cold buttermilk. Pour this mixture into the flour and butter mixture and stir gently with a wooden spoon. The dough should come together without becoming completely smooth. If the mixture needs additional moisture, the original recipe allows small additions of buttermilk until the dough comes together properly.
Avoiding Overmixing
Overmixing is not helpful when making biscuits. Once the wet ingredients have been incorporated and the dough has formed, stop stirring. Excessive handling can make the dough harder to work with and may produce a heavier texture. Gluten-free dough does not need to be kneaded like bread dough. A gentle approach is enough to bring the ingredients together while keeping the butter distributed through the mixture.
Chilling the Dough
The dough should be covered and refrigerated for at least 30 minutes. This gives the butter time to firm up after mixing and makes the dough easier to shape. The original recipe also states that the dough can be chilled overnight when desired. A cold dough is easier to handle and gives the butter a better chance of staying firm until the biscuits are placed in the oven.
Shaping the Biscuit Dough
After chilling, transfer the dough to a lightly floured surface. Gently knead it enough to bring it together, then roll or pat it to about 1½ to 2 inches thick. Try to keep the thickness even so the biscuits bake at the same rate. Avoid excessive kneading because the goal is to maintain a tender dough rather than develop a bread-like texture.
Cutting the Biscuits
Use a biscuit cutter to cut the dough into rounds. Press the cutter firmly into the dough and lift it straight back up. Avoid twisting the cutter because twisting can compress the edges and make it harder for the biscuits to rise properly. Place the cut biscuits side by side in a large round baking pan or another suitable baking dish, following the original preparation method.
Chilling the Cut Biscuits
After shaping, place the cut biscuits back in the refrigerator for another 15 to 30 minutes while the oven finishes heating. This second chilling period helps keep the butter cold. It can also help the shaped biscuits maintain their form during baking. If your kitchen is warm, this step becomes especially useful because the dough can soften quickly during cutting and shaping.
Preparing the Oven
Preheat the oven to 400°F, which is about 200°C. A fully heated oven is important because the biscuits need immediate heat once they are placed inside. Proper oven temperature helps the baking powder and baking soda work effectively. If the oven is still warming when the biscuits go in, the dough may spend too long heating gradually, which can affect the final height and texture.
Adding the Buttered Finish
Before baking, brush the tops of the chilled biscuits with melted butter. The original recipe uses 2 tablespoons of melted butter for this step. This gives the tops a richer flavor and helps them develop a pleasant golden surface during baking. Apply the butter evenly without soaking the dough so the biscuits can brown naturally in the oven.
Baking the Biscuits
Bake the biscuits for about 30 to 35 minutes, or until they are lightly browned and visibly well risen. Since ovens can vary, begin checking toward the end of the suggested baking period. The biscuits should look set rather than pale or wet. The original recipe specifies this baking range at 400°F.
Cooling Before Serving
Once the biscuits are baked, allow them to cool for 5 to 10 minutes before serving. This short resting period gives the interior time to settle while the exterior remains warm. Cutting into them immediately can make the soft center seem less structured. A few minutes of cooling makes them easier to split and serve while keeping that fresh-baked texture.
Serving for Breakfast
These gluten-free buttermilk biscuits make a useful breakfast side. Serve them warm with butter, jam, or another favorite spread. They can also be paired with scrambled eggs for a simple savory breakfast. Because the biscuit itself has a mild buttery flavor, it works well with both sweet and savory toppings without competing with the other foods on the plate.
Serving with Sausage Gravy
For a classic Southern-inspired breakfast, split the biscuits and spoon warm sausage gravy over the top. The soft biscuit absorbs the gravy while still providing enough structure to hold its shape. This combination is particularly useful when you want a hearty breakfast made without conventional wheat flour. If serving someone with celiac disease or a strong gluten intolerance, check every ingredient and avoid cross-contact during preparation.
Serving as a Dinner Side
There is no need to reserve these biscuits for breakfast. They can be served alongside soups, stews, roasted meats, vegetables, or other dinner dishes. Their buttery flavor makes them a useful substitute for standard wheat biscuits at the table. They are especially good with meals that include gravy or a sauce because the tender crumb can absorb some of the liquid without immediately falling apart.
Keeping the Biscuits Fresh
Allow leftover biscuits to cool completely before storing them. Place them in an airtight container to help protect them from drying out. Gluten-free baked goods can lose moisture more quickly than regular wheat-based products, so keeping them sealed is important. For the best texture, warm refrigerated biscuits before serving rather than eating them directly from the refrigerator.
Freezing the Biscuits
These gluten-free biscuits are suitable for longer storage in the freezer. The original recipe states that they can be frozen for up to three months when individually wrapped or stored in a freezer bag with excess air removed. Freezing is useful when you want to prepare biscuits ahead of time and have them available for future breakfasts or meals.
Handling Gluten-Free Dough
Gluten-free biscuit dough may feel different from conventional biscuit dough. It can be softer or slightly stickier depending on the flour blend used. This is not necessarily a problem. Avoid adding large amounts of extra flour simply because the dough does not feel exactly like wheat-based dough. Follow the ingredient quantities and add only the small amount of buttermilk needed to bring the mixture together.
Getting a Good Rise
Several steps work together to produce taller biscuits. The flour blend provides structure, xanthan gum helps bind the dough, and the combination of baking powder and baking soda provides lift. Cold butter supports the flaky texture, while chilling the shaped biscuits helps keep the dough firm. Finally, baking in a fully preheated oven allows the leavening agents to work as intended.
Avoiding Dry Biscuits
Dry gluten-free biscuits are often the result of too much flour or overbaking. Measure the flour carefully rather than adding extra flour during shaping. The original recipe uses 560 grams of gluten-free flour blend, so using a kitchen scale can help maintain the intended quantity. Watch the biscuits during the final part of baking and remove them once they are lightly browned and fully risen.
Avoiding Crumbly Biscuits
A biscuit that falls apart easily may need better binding or gentler handling. The xanthan gum in the gluten-free flour blend helps hold the dough together, while eggs also contribute structure. Cutting the butter properly and adding enough buttermilk are important as well. Do not overwork the dough after the wet ingredients are added, because excessive handling can make shaping more difficult.
Notes for Better Results
Keep the butter, eggs, and buttermilk cold from the beginning. Use a gluten-free flour blend with xanthan gum, chill the dough before shaping, and chill the cut biscuits again before baking. Press the biscuit cutter straight down rather than twisting it. If the dough becomes warm or difficult to handle, return it to the refrigerator before continuing. These small steps make the process easier and support a better rise.
A Practical Gluten-Free Baking Choice
These biscuits are a useful recipe for anyone looking for an easy gluten-free side that does not rely on complicated ingredients. The preparation uses familiar baking staples and a straightforward method: combine the dry ingredients, work in cold butter, add the egg and buttermilk mixture, chill, shape, chill again, and bake. The full recipe takes 20 minutes of preparation, 45 minutes of chilling, and 30 minutes of baking according to the source recipe.
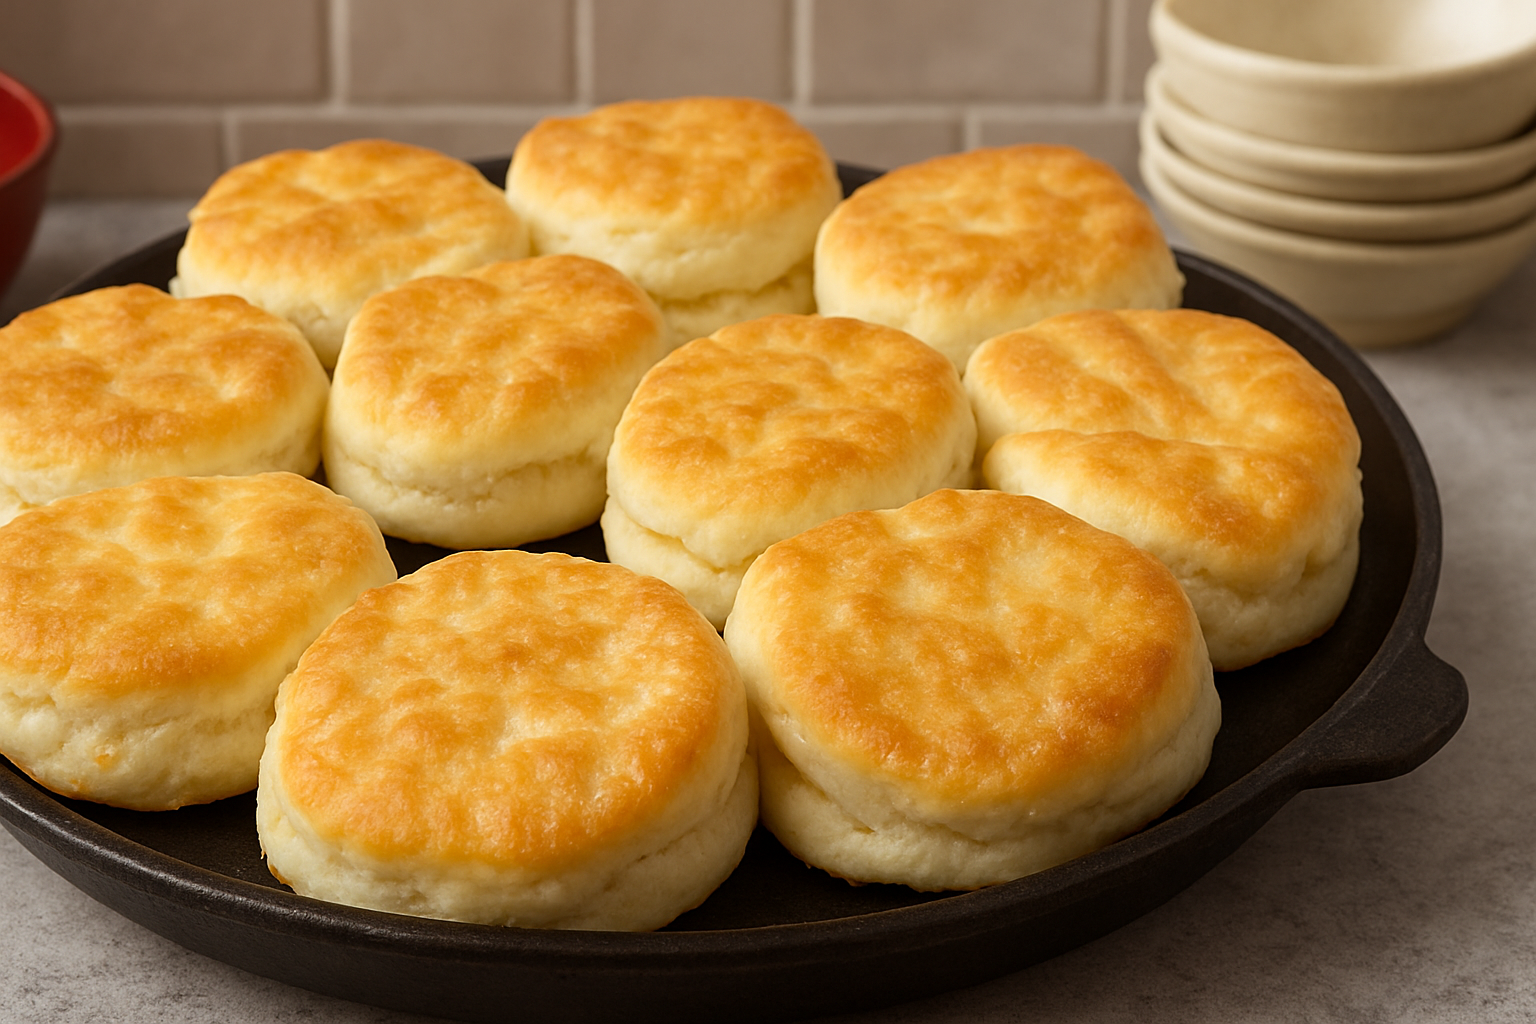
Gluten Free Buttermilk Biscuits
These gluten-free biscuits are soft, buttery, and flaky with crisp golden edges. Made with a gluten-free flour blend, cold butter, and buttermilk, they rise beautifully in the oven and work well for breakfast, brunch, or dinner.
12
biscuits20
minutes30
minutes45
minutes1
hour35
minutesIngredients
4 cups (560 g) gluten-free flour blend (preferably with xanthan gum)
¼ cup (45 g) baking powder
1 teaspoon salt
1 teaspoon baking soda
3 sticks (¾ lb or 339 g) cold butter, sliced into ¼-inch pieces
2 large eggs, cold
1¾ cups (420 ml) cold buttermilk (full fat for best results)
2 tablespoons melted butter
Directions
- In a large bowl, whisk together the gluten-free flour blend, baking powder, salt, and baking soda.
- Add the cold butter slices to the dry ingredients. Using a pastry cutter or your hands, incorporate the butter until pea-sized pieces remain.
- In a separate bowl, mix together the cold buttermilk and eggs.
- Pour the buttermilk mixture into the flour mixture and stir with a wooden spoon until just combined. The dough should be slightly wet; if needed, add 1-2 teaspoons of buttermilk at a time until the dough comes together.
- Cover the bowl and refrigerate the dough for at least 30 minutes, or overnight for even better results.
- Preheat the oven to 400°F (200°C).
- Remove the chilled dough from the refrigerator. On a lightly floured surface, gently knead the dough and roll or pat it out to 1½-2 inches thickness.
- Using a biscuit cutter, cut out biscuits and place them side by side in a large round baking pan or any suitable bakeware.
- Chill the biscuits in the refrigerator for an additional 15-30 minutes while preheating the oven.
- Brush the tops of the biscuits with melted butter.
- Bake for 30-35 minutes, or until lightly browned and well risen.
- Allow the biscuits to cool for 5-10 minutes before serving.
Notes
- These gluten-free biscuits freeze beautifully. Simply wrap them individually or store them in a freezer bag, removing excess air before sealing. They can be stored in the freezer for up to 3 months, ready to be enjoyed whenever the craving strikes!

