Few things feel as comforting as the smell of garlic and herbs drifting through the kitchen while bread bakes in the oven. This rustic garlic and herb loaf is deeply flavorful, golden-crusted, and perfect for everything from cozy soups to hearty sandwiches. Whether you’re baking with a traditional sourdough starter or need a simple gluten-free option, this recipe delivers warmth, aroma, and character in every slice.
This isn’t just bread — it’s the kind of bake that turns everyday meals into moments. Slow-fermented, fragrant, and satisfying, it’s the loaf people ask about long after the table’s been cleared.
Garlic & Herb Sourdough Bread
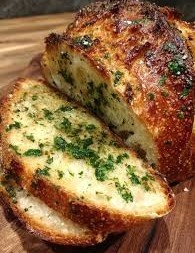
This garlic and herb sourdough starts with a classic base and builds flavor directly into the dough. The herbs infuse gently during fermentation, while garlic adds depth without overpowering the crumb. The result is a crusty, bakery-style loaf with a soft interior and bold, savory notes.
What Makes This Loaf Special
- Naturally fermented for better flavor
- Aromatic herbs baked directly into the dough
- Crisp crust with a tender, airy crumb
- Perfect for soups, toast, and sandwiches
Ingredients (Sourdough)
- 500 g bread flour
- 1 teaspoon garlic powder
- 1 teaspoon dried thyme or rosemary
- Pinch of black pepper
- 100 g active sourdough starter
- 350–375 g water, lukewarm
- 10 g salt
- Optional: olive oil and flaky salt for finishing
Step-by-Step: Garlic & Herb Sourdough Bread
1. Mix the Dry Ingredients
In a large bowl, combine the bread flour, garlic powder, dried herbs, and black pepper. Mixing the flavorings into the flour first ensures they’re evenly distributed throughout the dough.
2. Hydrate and Rest
Add the water and mix until a rough, shaggy dough forms. Cover and let rest for 30 minutes. This short rest allows the flour to hydrate fully and improves dough structure.
3. Add Starter and Salt
Mix in the active sourdough starter and salt until fully incorporated. The dough will begin to feel smoother and more elastic.
4. Bulk Fermentation
Cover the bowl and let the dough rise at room temperature for 4–5 hours. During the first 2 hours, perform stretch-and-folds every 30 minutes to build strength and improve the crumb.
5. Shape and Cold Proof
Shape the dough into a round or oval loaf. Place seam-side up into a well-floured proofing basket. Cover and refrigerate overnight for 12–16 hours to develop flavor and structure.
6. Bake
Preheat your oven to 475°F (245°C) with a Dutch oven inside. Carefully turn the dough out into the hot pot, score the top, and brush lightly with olive oil if desired. Sprinkle with flaky salt or extra herbs.
Bake covered for 20 minutes, then uncovered for 20–25 minutes until deeply golden and crisp.
Cool completely on a wire rack before slicing.
Serving & Storage (Sourdough)
This loaf shines in many roles:
- Toasted with olive oil or butter
- Served alongside soups and stews
- Used for bold sandwiches or grilled cheese
- Torn into chunks for dipping plates
Storage tips:
- Keep wrapped in a cloth or bread bag at room temperature for 2–3 days
- For longer storage, slice and freeze in an airtight bag
- Toast directly from frozen for best texture
- Avoid plastic wrap, which softens the crust too quickly
Leftover slices make excellent garlic toast, crostini, or homemade croutons.
Easy Garlic & Herb Gluten-Free Bread (No Kneading)
If you’re gluten free, this soft and fluffy garlic and herb bread is a simple, reliable option. There’s no kneading involved, and the batter-style dough makes it beginner friendly. It bakes up moist inside with a lightly golden crust and plenty of savory flavor.
Ingredients (Gluten-Free)
Dry
- 2 cups gluten-free all-purpose flour (with xanthan gum)
- 1 tablespoon sugar
- 2 teaspoons instant yeast
- 1 teaspoon salt
- 1 teaspoon dried oregano
- 1 teaspoon dried basil
- 1 teaspoon dried parsley
Wet
- 1 cup warm water (not hot)
- 2 tablespoons olive oil
- 1 egg, room temperature
- 3 cloves garlic, minced (or 1 teaspoon garlic powder)
How to Make Garlic & Herb Gluten-Free Bread
1. Make the Batter
In a large bowl, whisk together all dry ingredients. Add the warm water, olive oil, egg, and garlic. Mix until smooth and thick. Gluten-free dough will resemble a heavy batter rather than traditional dough.
2. Rise
Grease a loaf pan and pour in the batter. Smooth the top with a wet spoon. Cover loosely and let rise in a warm place for 35–45 minutes, until slightly puffed.
3. Bake
Preheat the oven to 180°C (350°F). Bake for 35–40 minutes until golden and firm to the touch.
Cool completely before slicing — gluten-free bread sets as it cools and slices best once fully rested.
Optional Add-Ins
- ¼ cup shredded cheese (dairy-free or regular)
- Fresh herbs like parsley, chives, or coriander
- Olive oil or garlic butter brushed on top after baking
Final Thoughts
Whether you choose the slow-fermented sourdough or the easy gluten-free version, garlic and herb bread is one of those bakes that feels deeply satisfying. It’s rustic, fragrant, and endlessly versatile — equally suited to quiet mornings and shared meals.
Wrapped in parchment and twine, it even makes a thoughtful edible gift. Add a small jar of herbed butter or olive oil, and you’ve got something special made with care — the kind of bread people remember.
Few things feel as comforting as the smell of garlic and herbs drifting through the kitchen while bread bakes in the oven. This rustic garlic and herb loaf is deeply flavorful, golden-crusted, and perfect for everything from cozy soups to hearty sandwiches. Whether you’re baking with a traditional sourdough starter or need a simple gluten-free option, this recipe delivers warmth, aroma, and character in every slice.
This isn’t just bread — it’s the kind of bake that turns everyday meals into moments. Slow-fermented, fragrant, and satisfying, it’s the loaf people ask about long after the table’s been cleared.
Garlic & Herb Sourdough Bread
This garlic and herb sourdough starts with a classic base and builds flavor directly into the dough. The herbs infuse gently during fermentation, while garlic adds depth without overpowering the crumb. The result is a crusty, bakery-style loaf with a soft interior and bold, savory notes.
What Makes This Loaf Special
- Naturally fermented for better flavor
- Aromatic herbs baked directly into the dough
- Crisp crust with a tender, airy crumb
- Perfect for soups, toast, and sandwiches
Ingredients (Sourdough)
- 500 g bread flour
- 1 teaspoon garlic powder
- 1 teaspoon dried thyme or rosemary
- Pinch of black pepper
- 100 g active sourdough starter
- 350–375 g water, lukewarm
- 10 g salt
- Optional: olive oil and flaky salt for finishing
Step-by-Step: Garlic & Herb Sourdough Bread
1. Mix the Dry Ingredients
In a large bowl, combine the bread flour, garlic powder, dried herbs, and black pepper. Mixing the flavorings into the flour first ensures they’re evenly distributed throughout the dough.
2. Hydrate and Rest
Add the water and mix until a rough, shaggy dough forms. Cover and let rest for 30 minutes. This short rest allows the flour to hydrate fully and improves dough structure.
3. Add Starter and Salt
Mix in the active sourdough starter and salt until fully incorporated. The dough will begin to feel smoother and more elastic.
4. Bulk Fermentation
Cover the bowl and let the dough rise at room temperature for 4–5 hours. During the first 2 hours, perform stretch-and-folds every 30 minutes to build strength and improve the crumb.
5. Shape and Cold Proof
Shape the dough into a round or oval loaf. Place seam-side up into a well-floured proofing basket. Cover and refrigerate overnight for 12–16 hours to develop flavor and structure.
6. Bake
Preheat your oven to 475°F (245°C) with a Dutch oven inside. Carefully turn the dough out into the hot pot, score the top, and brush lightly with olive oil if desired. Sprinkle with flaky salt or extra herbs.
Bake covered for 20 minutes, then uncovered for 20–25 minutes until deeply golden and crisp.
Cool completely on a wire rack before slicing.
Serving & Storage (Sourdough)
This loaf shines in many roles:
- Toasted with olive oil or butter
- Served alongside soups and stews
- Used for bold sandwiches or grilled cheese
- Torn into chunks for dipping plates
Storage tips:
- Keep wrapped in a cloth or bread bag at room temperature for 2–3 days
- For longer storage, slice and freeze in an airtight bag
- Toast directly from frozen for best texture
- Avoid plastic wrap, which softens the crust too quickly
Leftover slices make excellent garlic toast, crostini, or homemade croutons.
Easy Garlic & Herb Gluten-Free Bread (No Kneading)
If you’re gluten free, this soft and fluffy garlic and herb bread is a simple, reliable option. There’s no kneading involved, and the batter-style dough makes it beginner friendly. It bakes up moist inside with a lightly golden crust and plenty of savory flavor.
Ingredients (Gluten-Free)
Dry
- 2 cups gluten-free all-purpose flour (with xanthan gum)
- 1 tablespoon sugar
- 2 teaspoons instant yeast
- 1 teaspoon salt
- 1 teaspoon dried oregano
- 1 teaspoon dried basil
- 1 teaspoon dried parsley
Wet
- 1 cup warm water (not hot)
- 2 tablespoons olive oil
- 1 egg, room temperature
- 3 cloves garlic, minced (or 1 teaspoon garlic powder)
How to Make Garlic & Herb Gluten-Free Bread
1. Make the Batter
In a large bowl, whisk together all dry ingredients. Add the warm water, olive oil, egg, and garlic. Mix until smooth and thick. Gluten-free dough will resemble a heavy batter rather than traditional dough.
2. Rise
Grease a loaf pan and pour in the batter. Smooth the top with a wet spoon. Cover loosely and let rise in a warm place for 35–45 minutes, until slightly puffed.
3. Bake
Preheat the oven to 180°C (350°F). Bake for 35–40 minutes until golden and firm to the touch.
Cool completely before slicing — gluten-free bread sets as it cools and slices best once fully rested.
Optional Add-Ins
- ¼ cup shredded cheese (dairy-free or regular)
- Fresh herbs like parsley, chives, or coriander
- Olive oil or garlic butter brushed on top after baking
Final Thoughts
Whether you choose the slow-fermented sourdough or the easy gluten-free version, garlic and herb bread is one of those bakes that feels deeply satisfying. It’s rustic, fragrant, and endlessly versatile — equally suited to quiet mornings and shared meals.
Wrapped in parchment and twine, it even makes a thoughtful edible gift. Add a small jar of herbed butter or olive oil, and you’ve got something special made with care — the kind of bread people remember.
